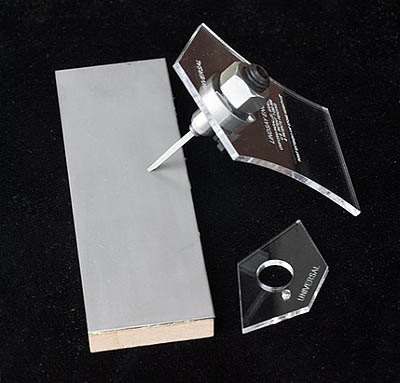
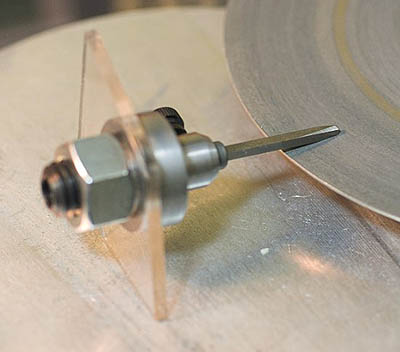
Lindsay Graver Sharpener
Can be used with 1/2" high bench stones or a power rotary grinder
Special thanks
to Paul Hamler for all his help with this sharpener!!
The Lindsay graver sharpening fixture is a quick way to consistently sharpen a 3/32” square graver point accurately.
Using templates, the sharpener will grind the patented Uniform
Parallel Point™ in a variety of configurations and it will also produce other points.
The standard Universal template that comes with the sharpener produces a V point similar to the one that comes with the purchase of a Classic AirGraver. Additional templates are available.
If utilizing the diamond bench stones, be sure the surface the templates are placed on is not abrasive.
This could cause the edge profile of the templates to wear down. A counter
or bench top works well.
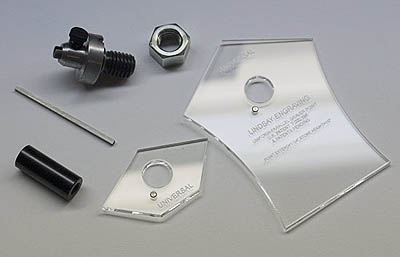
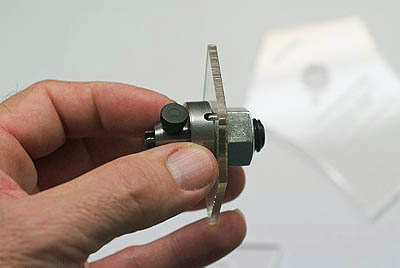
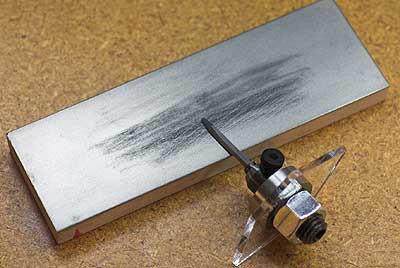
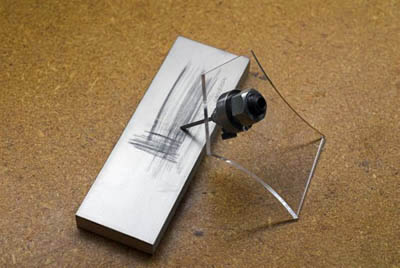
The fixture is a tilt type sharpener that uses templates. The fixture consists of a body, a holding
nut, a length gauge and templates.
This short tutorial illustrates the use of diamond bench stones to grind the point. A power hone can also be used, but grinding a Carbalt graver blank with diamond
bench stones can be accomplished in a few minutes. Once a point is to shape, it is easy to touch up the point with a diamond bench stone.
First, place the smaller template on the fixture. Templates have a small pin protruding from one side. Line the pin up with the
slot in the body as shown.
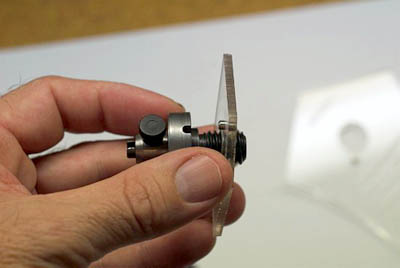
The template is now in position on the fixture with the pin lined up and in the slot.
Thread the nut onto the fixture to keep the template in place.
Tighten the nut with your fingers. It only needs to be snug.
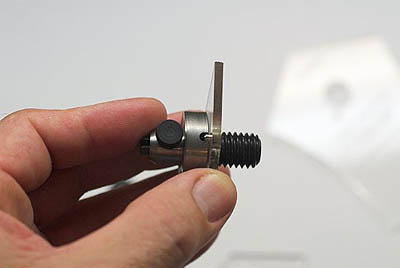
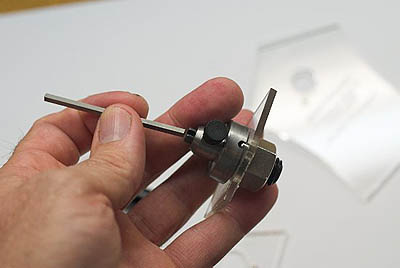
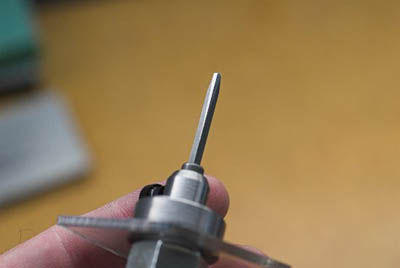
Insert a 3/32" graver blank into the collet in the nose of the fixture.
Set the length gauge over the graver.
Adjust the length of the graver blank so that it is flush with the end of the gauge and tighten the thumb screw to hold the graver blank in place.
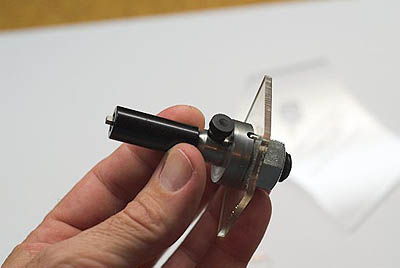
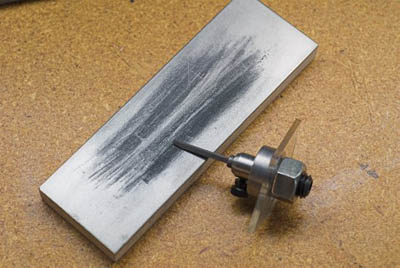
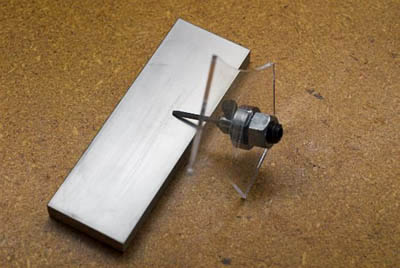
Using the 260 grit 1/2" thick diamond bench stone, grind the top three facets on the top of
the point.
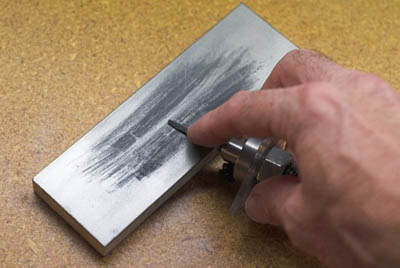
Set fixture and bench stone down on a flat, smooth surface.
Position your hand as shown and rub the graver back and forth against the stone.
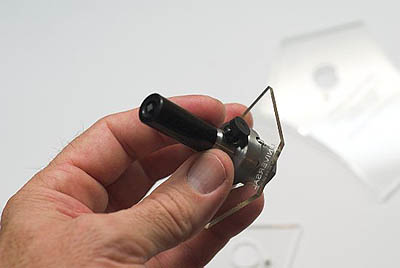
Roll the fixture over to one of the other two top facets and grind them.
The top three facets of the point are now finished. Grind the top two side facets the
same amount so they are even with each other.
Grinding these three facets will determine how far the point is tapered down. You may come back after the
point is finished and grind on these more if you desire the graver point to have a thinner taper.
Next, roll the fixture over and grind the two long relief facets on the bottom of the graver. Grind these
somewhat evenly too. If they are not perfectly even, it will not matter.
The bottom two facets are now finished.
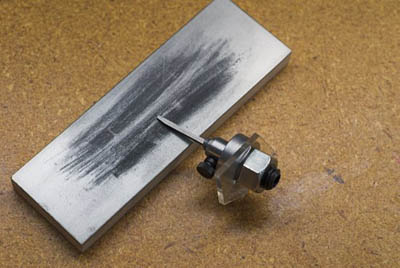
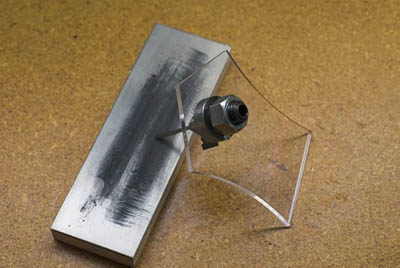
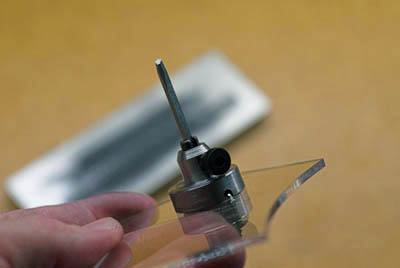
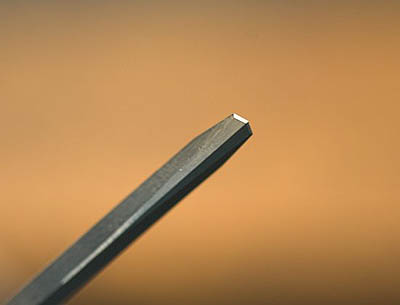
Remove the small template and install the larger one. The larger template is for grinding the face of
the graver and the two heels.
The picture at the left shows the face being ground.
The face of the graver is now finished
Change to a 600 or 1200 grit diamond stone and grind the face more for a finer finish. For a
polished face, change to the 2000 grit diamond stone.
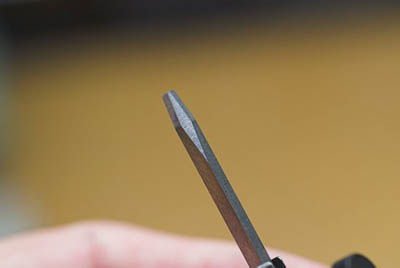
Finally, grind the two tiny heel facets. Be careful not to grind them too large. Finish the heels
with the 2000 diamond stone for a brighter engraving cut, if desired.
Rather than grinding from side to side it may be desirable to place the heels on by rubbing to-and-fro.
The two tiny heel facets are completed and the graver is now finished and ready for engraving.
Leave the larger template on the fixture for quick touch-ups when the point becomes dull or if the point breaks. Be
sure to place (index) the graver back in the fixture the same way and use the length gauge.
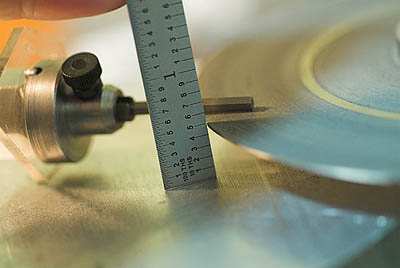
If desired, a power hone can be utilized instead of bench stones. In order for the fixture to work properly,
the distance from the surface that the fixture sits on to the grinding surface needs to be 1/2". Measure this distance on your power hone and
if it is not 1/2" use something to sit on the surface to adjust the distance to 1/2".
The power hone pictured here is grinding one of the top three facets to taper the point to make an overall
smaller point and face.
Using the universal template with the provided 1 ¼” length gauge will produce a 45 degree face with a 16.5 degree high
heel. However, the face and heel angles can be changed together in the fixture by simply reducing the length that the graver protrudes from the fixture. Tightening the
graver in the fixture shorter than the provided gauge will make a steeper than 45 degree face as well as a steeper than 16.5 degree heel height. Be sure to grind the
face, belly relief grinds, and the heels with the graver protruding from the fixture the same distance in order for the point to produce a
Uniform Parallel Point™.
The length gauge that you received with the fixture is 1-¼ long. It will produce a 45 degree face, 16.3 degree high heel.
If you instead lock the graver in so it is protruding 1-5/8” it will make a 41 degree face with a 14 degree high heel. Setting the length to 7/8” will produce a 50
degree face with a 19.5 degree high heel. The measurement is from the shoulder on the sharpener. Check where the shipped length gauge measures from. That is the
shoulder to measure from. If you’re grinding one of the Uniform Parallel heeled gravers be sure to grind the long relief grinds on the bottom of the graver as well as
the small heel and the face with the graver sticking out the same length so the heels come out uniform.
1.625" = 41 face, 14.0 high heel
1.250" = 45 face, 16.3 high heel
0.875" = 50 face, 19.5 high heel
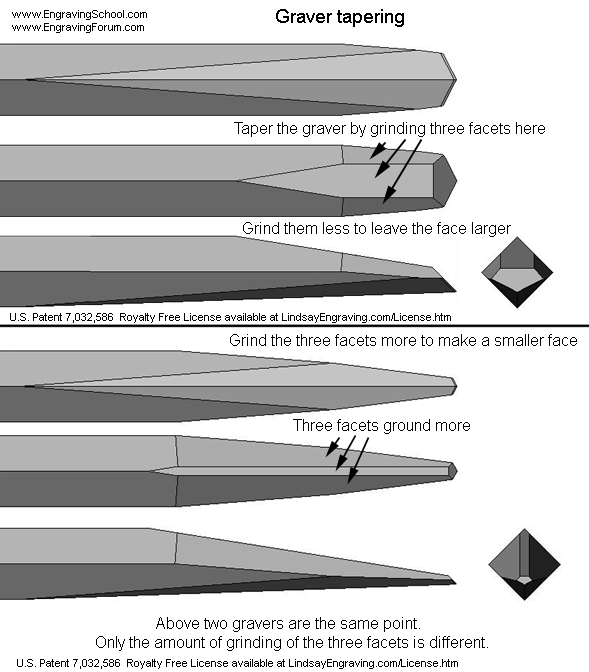
Tapering
Grind the top and sides of the graver shank at around 10 degrees. It
is unimportant what angle is used or how the shank is narrowed or
tapered. I use three facets on the top for the tapering but it will
also work to round the top of the graver or use other facets on top
and on the sides.
More information and cautions about
tapering.
Click to enlarge
What
width of V should be used on the primary heels?
The V width angles I use generally range from 115 to 135. For the banknote
style and bright-cut lettering engraving, I favor about a 125. If a person
does a lot of bright-cut engraving, a polished 130 or even 135 can be
easier to use than a polished flat graver. For those that have been
engraving with a 90 degree point, a narrower 100 to 110 might be easier to
begin with, then working up to the 120 - 125 range. If a person is just
starting out, it is probably best to begin right away around 110 - 120.
The engraver won't have to learn twice, and it will also help to prevent
developing a “heavy hand”. Coming from a narrow graver to a wider graver
tends to give a person a heavy hand, and it is hard for the person to hold
back from engraving too deeply when switching to a wider point. In the
end, however, I find that a wider point is easier to control for both
shade lines and outlines.
The patented geometry can conceivably have any
width V angle (narrow or wide), as well as any loft primary heel angle or
face angle. With this said, there is nothing wrong with a narrower point
being used with the secondary relieving facets. A narrower graver, such as
a 90 degree point, is more forgiving and will keep from cutting too wide
with a heavy hand. If you do use a 90 degree point, try it with the
relieving facets along with the additional clearance option described
above.
Polishing
The primary heels and face can be polished if desired, but unless you're
doing bright cut engraving it this isn't necessary. Apply 60,000
mesh diamond compound to a ceramic, steel, copper, or brass lap, and use
it for polishing the face and the two primary heel facets.
When a metal or castiron lap is used, some of the diamond
will embed itself into the metal, preventing it from wiping off.
This is called “charging” a lap. NOTE: When polishing, do not lean
or push on the graver point while it is being polished. Let the graver
ride softly on the lap, and allow the diamond to work. If the engraver
pushes while using a metal polishing lap, the graver will chew the metal
lap up. Hold the graver on the lap softly. The back side of a
metal diamond lap can work for a polishing lap.
Point
strength and points breaking
The blunter angle a point is, the stronger it will be. Here are
methods to increase strength for when points start breaking.
1: Dubbing the point. After the point is sharpened hold it up on a
stone or lap at a steeper angle than the face was ground and grind a
very small 2nd face. For example if the face angle on the graver is
at 45 degrees then maybe use 60 degrees. Set it on the lap or stone
and very lightly move it a short distance by hand. This will place a
60 degree face at the very tip. If engraving a hard metal and the
point is still breaking, this angle can be raised all the way to 90
degrees (the graver will be vertical). If it is still breaking try a
little larger 90 face or go to a wider V point.
2: The wider a primary V heel used, the stronger the point will be.
If you want to use a narrow graver in hard metal about all you can
do is use High Speed Steel or Cobalt and dub the point. A narrow V
is just too fragile when made from Carbalt or Carbide. If you can
use a wide point instead of narrow, do so with Carbalt and dub it
slightly. This is about as tough of point as possible.
Click Image to Enlarge
Negative ground secondary relief facets
Use of a negative
angle when grinding the relief facets will provide more clearance.
Instead of a positive 1 or 5 degrees use a negative angle, up to
negative 10 degrees. Negative ground relief facets will appear as
notched facets and will taper the graver shank behind the point in the
opposite direction as positive loft secondary relief facets.


.png)